Rust Macros Demystified: When and How to Use Them

Rust Macros Demystified: When and How to Use Them
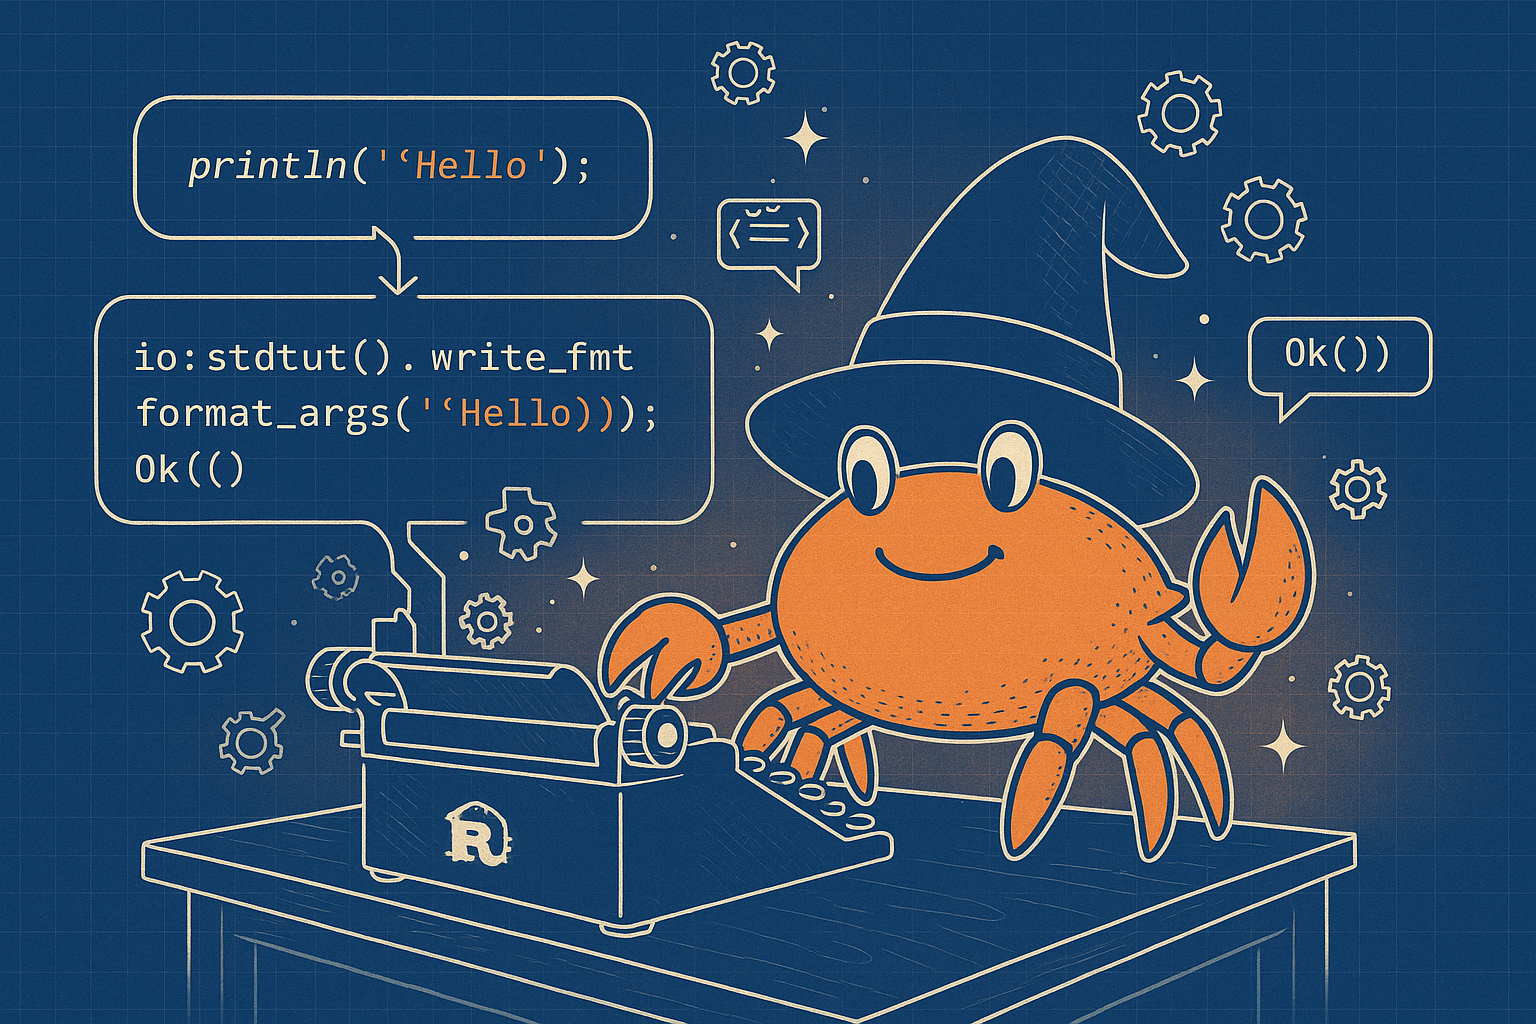
Ever wondered how println!, vec!, and panic! work their magic in Rust? The secret is macros – one of Rust's most powerful yet misunderstood features.
When I first encountered Rust macros, I thought they were some kind of dark magic that only compiler wizards could understand. The syntax looked weird, the error messages were cryptic, and honestly, I avoided them for months. But here's the thing – macros are actually one of the coolest features in Rust, and once you understand them, they'll change how you think about code.
In this guide, I'll demystify Rust macros by showing you practical examples, real-world use cases, and step-by-step tutorials. Whether you're a beginner who's curious about those exclamation marks in Rust code or an intermediate developer looking to level up, this post will make macros click for you.
What Are Macros, Really?
Think of macros as "code that writes code." Instead of running at runtime like regular functions, macros run at compile time and generate Rust code for you. It's like having a personal assistant who writes repetitive code patterns while you focus on the interesting stuff.
Here's a simple analogy: Imagine you're writing emails and you notice you always start with "Dear [Name], I hope this email finds you well." Instead of typing this every time, you create a template. Macros work similarly – they're templates for code patterns you use frequently.
Why Macros Matter: The Problems They Solve
Before diving into syntax, let's understand why macros exist. Here are real problems macros solve:
1. Eliminating Repetitive Code
Without macros, creating a vector would look like this:
let mut v = Vec::new();
v.push(1);
v.push(2);
v.push(3);
With the vec! macro:
let v = vec![1, 2, 3];2. Flexible Function Arguments
Regular functions have fixed parameter counts. Macros can take any number of arguments:
println!("Hello");                    // 1 argument
println!("Hello, {}!", name);         // 2 arguments
println!("{} + {} = {}", a, b, c);    // 4 arguments
3. Code Generation at Compile Time
Macros can generate complex code structures that would be impossible or inefficient to create at runtime.
The Two Types of Macros
Rust has two main types of macros, and understanding the difference is crucial:
Declarative Macros (The Easy Ones)
These are pattern-based macros that match input patterns and generate code. Think of them as sophisticated find-and-replace operations.
Procedural Macros (The Powerful Ones)
These are functions that take Rust code as input and produce Rust code as output. They're more complex but incredibly powerful.
Let's start with declarative macros since they're easier to understand.
Declarative Macros: Your First Step into Macro Land
Declarative macros use the macro_rules! syntax. Here's the basic structure:
macro_rules! macro_name {
    (pattern) => {
        expansion
    };
}
Building Your First Macro: A Simple Greeting
Let's create a macro that generates personalized greetings:
macro_rules! greet {
    ($name:expr) => {
        println!("Hello, {}! Welcome to the macro world!", $name);
    };
}

fn main() {
    greet!("Alice");
    greet!("Bob");
    // Expands to:
    // println!("Hello, {}! Welcome to the macro world!", "Alice");
    // println!("Hello, {}! Welcome to the macro world!", "Bob");
}
What's happening here?
$name:expr captures an expression and names it name$name in the expansion refers to the captured expression:expr is a fragment specifier (more on these later)Fragment Specifiers: The Building Blocks
Fragment specifiers tell macros what kind of Rust syntax to expect:
macro_rules! example_fragments {
    // $e:expr matches any expression
    (expr $e:expr) => { println!("Expression: {}", $e); };

    // $i:ident matches identifiers (variable names, function names, etc.)
    (ident $i:ident) => { println!("Identifier: {}", stringify!($i)); };

    // $t:ty matches type names
    (type $t:ty) => { println!("Type: {}", stringify!($t)); };

    // $s:stmt matches statements
    (stmt $s:stmt) => { $s };
}

fn main() {
    example_fragments!(expr 2 + 2);        // Expression: 4
    example_fragments!(ident my_variable);  // Identifier: my_variable
    example_fragments!(type String);       // Type: String
    example_fragments!(stmt let x = 5);    // Executes: let x = 5;
}
Real-World Example: A Debug Macro
Let's build something useful – a macro that prints variable names and values:
macro_rules! debug_print {
    ($var:expr) => {
        println!("{} = {:?}", stringify!($var), $var);
    };
}

fn main() {
    let name = "Rust";
    let version = 1.70;
    let is_awesome = true;

    debug_print!(name);        // name = "Rust"
    debug_print!(version);     // version = 1.70
    debug_print!(is_awesome);  // is_awesome = true
}
This is incredibly useful for debugging! The stringify! macro converts the expression to a string literal.
Handling Multiple Patterns
Macros can have multiple patterns, like a match statement:
macro_rules! calculate {
    // Addition
    ($a:expr + $b:expr) => {
        $a + $b
    };

    // Subtraction
    ($a:expr - $b:expr) => {
        $a - $b
    };

    // Multiplication
    ($a:expr * $b:expr) => {
        $a * $b
    };

    // Division with safety check
    ($a:expr / $b:expr) => {
        if $b != 0 {
            $a / $b
        } else {
            panic!("Division by zero!");
        }
    };
}

fn main() {
    println!("5 + 3 = {}", calculate!(5 + 3));     // 8
    println!("10 - 4 = {}", calculate!(10 - 4));   // 6
    println!("6 * 7 = {}", calculate!(6 * 7));     // 42
    println!("15 / 3 = {}", calculate!(15 / 3));   // 5
}
Variable Arguments with Repetition
One of the coolest features of macros is handling variable numbers of arguments:
macro_rules! find_max {
    ($first:expr) => {
        $first
    };

    ($first:expr, $($rest:expr),+) => {
        {
            let first_val = $first;
            let rest_max = find_max!($($rest),+);
            if first_val > rest_max {
                first_val
            } else {
                rest_max
            }
        }
    };
}

fn main() {
    println!("Max of 5: {}", find_max!(5));                    // 5
    println!("Max of 3, 7, 2: {}", find_max!(3, 7, 2));       // 7
    println!("Max of 1, 8, 3, 9, 2: {}", find_max!(1, 8, 3, 9, 2)); // 9
}
Breaking down the repetition syntax:
$($rest:expr),+ means "one or more expressions separated by commas"$(...),* would mean "zero or more"$(...);* would use semicolon as separatorBuilding a Configuration Macro
Let's create something practical – a macro for creating configuration structs:
macro_rules! config {
    ($struct_name:ident { $($field:ident: $type:ty = $default:expr),* }) => {
        #[derive(Debug, Clone)]
        struct $struct_name {
            $(pub $field: $type,)*
        }

        impl $struct_name {
            fn new() -> Self {
                Self {
                    $($field: $default,)*
                }
            }
        }
    };
}

// Usage
config!(ServerConfig {
    host: String = "localhost".to_string(),
    port: u16 = 8080,
    max_connections: usize = 100,
    timeout: u64 = 30
});

fn main() {
    let config = ServerConfig::new();
    println!("{:#?}", config);
}
This generates a complete struct with default values and a constructor – pretty powerful for just a few lines!
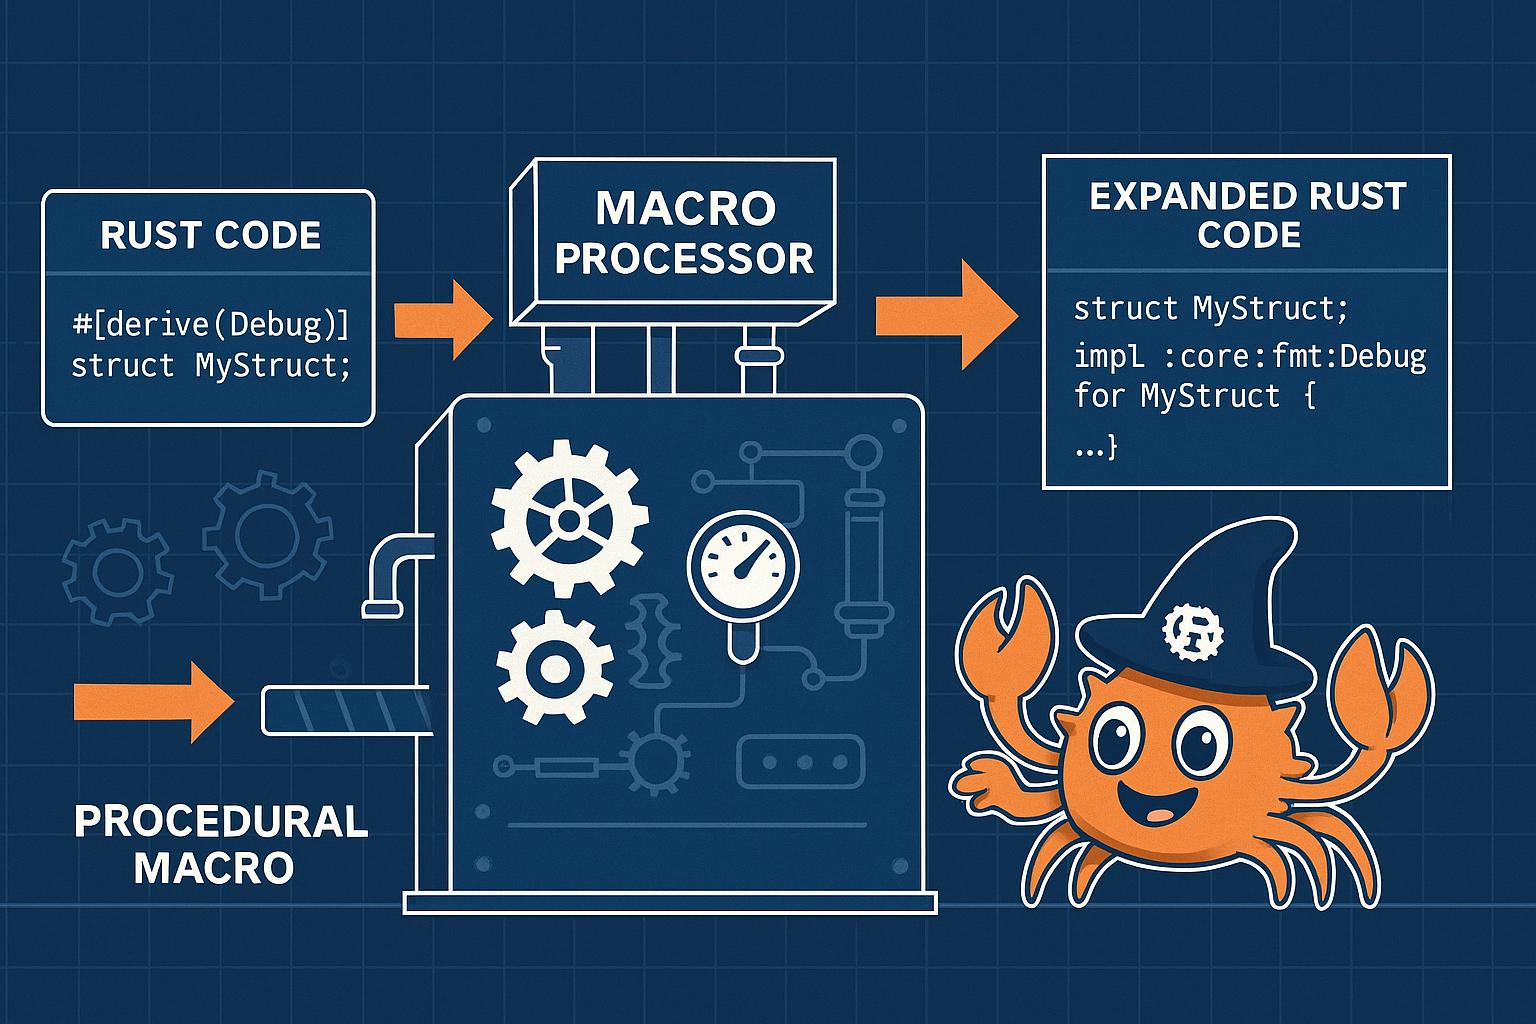
Procedural Macros: The Advanced Stuff
Procedural macros are more complex but offer unlimited flexibility. They're actually Rust functions that manipulate token streams. There are three types:
1. Function-like macros (similar to declarative macros)
2. Derive macros (like #[derive(Debug)])
3. Attribute macros (like #[test])
Setting Up for Procedural Macros
First, create a new library crate for your procedural macros:
cargo new my_macros --lib
cd my_macros
Update Cargo.toml:
[lib]
proc-macro = true

[dependencies]
proc-macro2 = "1.0"
quote = "1.0"
syn = { version = "2.0", features = ["full"] }
Your First Procedural Macro
Let's create a simple function-like procedural macro:
// In src/lib.rs
use proc_macro::TokenStream;
use quote::quote;
use syn::{parse_macro_input, Expr};

#[proc_macro]
pub fn make_answer(_input: TokenStream) -> TokenStream {
    let expanded = quote! {
        42
    };

    TokenStream::from(expanded)
}
Usage:
// In another crate
use my_macros::make_answer;

fn main() {
    let answer = make_answer!();
    println!("The answer is: {}", answer); // The answer is: 42
}
A More Practical Example: Automatic Getters
Let's create a derive macro that automatically generates getter methods:
use proc_macro::TokenStream;
use quote::quote;
use syn::{parse_macro_input, Data, DeriveInput, Fields};

#[proc_macro_derive(Getters)]
pub fn derive_getters(input: TokenStream) -> TokenStream {
    let input = parse_macro_input!(input as DeriveInput);
    let name = &input.ident;

    let getters = match &input.data {
        Data::Struct(data_struct) => {
            match &data_struct.fields {
                Fields::Named(fields_named) => {
                    let getter_methods = fields_named.named.iter().map(|field| {
                        let field_name = &field.ident;
                        let field_type = &field.ty;

                        quote! {
                            pub fn #field_name(&self) -> &#field_type {
                                &self.#field_name
                            }
                        }
                    });

                    quote! {
                        impl #name {
                            #(#getter_methods)*
                        }
                    }
                }
                _ => quote! {},
            }
        }
        _ => quote! {},
    };

    TokenStream::from(getters)
}
Usage:
use my_macros::Getters;

#[derive(Getters)]
struct Person {
    name: String,
    age: u32,
    email: String,
}

fn main() {
    let person = Person {
        name: "Alice".to_string(),
        age: 30,
        email: "alice@example.com".to_string(),
    };

    // Automatically generated getters!
    println!("Name: {}", person.name());
    println!("Age: {}", person.age());
    println!("Email: {}", person.email());
}
When to Use Macros vs Functions
This is probably the most important question: when should you use macros instead of regular functions?
Use Macros When:
1. You need variable numbers of arguments
``rust
println!("One arg: {}", x);
println!("Two args: {} {}", x, y);
`
2. You need to operate on code structure
`rust
debug_print!(variable_name); // Needs the variable name as text
`
3. You need compile-time code generation
`rust
vec![1, 2, 3]; // More efficient than runtime construction
`
4. You're creating domain-specific languages (DSLs)
`rust
html! {
``{"Hello, World!"}
Use Functions When:
1. Regular computation and logic 2. Type checking is important 3. You want easier debugging 4. The code is straightforward
The Golden Rule
Start with functions. Only use macros when functions can't solve your problem.
Common Macro Patterns and Recipes
1. The Builder Pattern Macro
macro_rules! builder {
    ($struct_name:ident { $($field:ident: $type:ty),* }) => {
        #[derive(Default)]
        struct $struct_name {
            $($field: Option<$type>,)*
        }

        impl $struct_name {
            fn new() -> Self {
                Self::default()
            }

            $(
                fn $field(mut self, value: $type) -> Self {
                    self.$field = Some(value);
                    self
                }
            )*

            fn build(self) -> Result<Built, &'static str> {
                Ok(Built {
                    $($field: self.$field.ok_or(concat!("Missing field: ", stringify!($field)))?,)*
                })
            }
        }

        struct Built {
            $($field: $type,)*
        }
    };
}

// Usage
builder!(UserBuilder {
    name: String,
    age: u32,
    email: String
});

fn main() {
    let user = UserBuilder::new()
        .name("Alice".to_string())
        .age(30)
        .email("alice@example.com".to_string())
        .build()
        .unwrap();
}
2. Enum Variant Counter
macro_rules! count_variants {
    ($enum_name:ident { $($variant:ident),* }) => {
        enum $enum_name {
            $($variant,)*
        }

        impl $enum_name {
            const VARIANT_COUNT: usize = count_variants!(@count $($variant)*);
        }

        // Helper to count variants
        count_variants!(@impl_count $enum_name, 0, $($variant)*);
    };

    (@count) => { 0 };
    (@count $head:ident $($tail:ident)*) => { 1 + count_variants!(@count $($tail)*) };

    (@impl_count $enum_name:ident, $index:expr,) => {};
    (@impl_count $enum_name:ident, $index:expr, $variant:ident $($tail:ident)*) => {
        count_variants!(@impl_count $enum_name, $index + 1, $($tail)*);
    };
}

count_variants!(Color {
    Red,
    Green,
    Blue,
    Yellow
});

fn main() {
    println!("Color has {} variants", Color::VARIANT_COUNT); // 4
}
3. Simple Test Framework
macro_rules! test_suite {
    ($suite_name:ident {
        $($test_name:ident: $test_code:block)*
    }) => {
        mod $suite_name {
            $(
                #[test]
                fn $test_name() {
                    $test_code
                }
            )*
        }
    };
}

// Usage
test_suite!(math_tests {
    addition: {
        assert_eq!(2 + 2, 4);
    }

    subtraction: {
        assert_eq!(5 - 3, 2);
    }

    multiplication: {
        assert_eq!(3 * 4, 12);
    }
});
Debugging Macros: When Things Go Wrong
Macro debugging can be tricky, but here are some strategies:
1. Use `cargo expand`
Install and use cargo-expand to see what your macros generate:
cargo install cargo-expand
cargo expand
2. Add Debug Prints in Procedural Macros
#[proc_macro_derive(MyMacro)]
pub fn my_macro(input: TokenStream) -> TokenStream {
    let input = parse_macro_input!(input as DeriveInput);

    // Debug: print the input
    eprintln!("Input: {:#?}", input);

    let expanded = quote! {
        // Your macro implementation
    };

    // Debug: print the output
    eprintln!("Generated: {}", expanded);

    TokenStream::from(expanded)
}
3. Start Simple and Build Up
Always start with the simplest possible version of your macro and gradually add complexity.
Real-World Examples from Popular Crates
1. Serde's Derive Macros
use serde::{Deserialize, Serialize};

#[derive(Serialize, Deserialize)]
struct Person {
    name: String,
    age: u32,
}

// The derive macros generate all the serialization code!
2. Clap's Command-Line Parsing
use clap::{Parser, Subcommand};

#[derive(Parser)]
#[command(name = "my-app")]
struct Cli {
    #[arg(short, long)]
    verbose: bool,

    #[command(subcommand)]
    command: Commands,
}

#[derive(Subcommand)]
enum Commands {
    Add { name: String },
    Remove { name: String },
}
3. Tokio's Async Main
#[tokio::main]
async fn main() -> Result<(), Box<dyn std::error::Error>> {
    // This macro sets up the async runtime for you!
    let response = reqwest::get("https://httpbin.org/ip").await?;
    println!("{}", response.text().await?);
    Ok(())
}
Performance Considerations
Macro Performance Benefits
1. Zero runtime cost - macros run at compile time 2. Inlining opportunities - generated code can be optimized 3. Avoiding allocations - macros can generate stack-based code
Compile Time Costs
1. Slower compilation - complex macros increase build time 2. Code bloat - macros can generate lots of code 3. Error propagation - macro errors can be hard to understand
Best Practices for Performance
// Good: Simple, focused macro
macro_rules! quick_debug {
    ($val:expr) => {
        println!("{} = {:?}", stringify!($val), $val)
    };
}

// Potentially problematic: Complex macro that generates lots of code
macro_rules! generate_all_methods {
    // ... very complex implementation
}
Advanced Macro Techniques
1. Macro Hygiene and Scope
Macros maintain hygiene by default, meaning variables in macros don't interfere with surrounding code:
macro_rules! create_temp_var {
    () => {
        let temp = "from macro";
        println!("{}", temp);
    };
}

fn main() {
    let temp = "from main";
    create_temp_var!(); // Prints "from macro"
    println!("{}", temp); // Prints "from main"
}
2. Using `$crate` for Path Resolution
When your macro is in a library, use $crate to refer to items in your crate:
macro_rules! call_my_function {
    () => {
        $crate::my_internal_function()
    };
}
3. Conditional Compilation in Macros
macro_rules! debug_or_release {
    ($debug_code:block, $release_code:block) => {
        #[cfg(debug_assertions)]
        $debug_code

        #[cfg(not(debug_assertions))]
        $release_code
    };
}

fn main() {
    debug_or_release!(
        {
            println!("Debug mode: lots of information");
        },
        {
            println!("Release mode: minimal output");
        }
    );
}
Learning Resources and Next Steps
Books
- "The Rust Programming Language" (Chapter 19)
Practice Projects
1. Create a simple DSL for configuration files 2. Build a derive macro for common trait implementations 3. Write a function-like macro that generates test data
Exploration Ideas
- Study macros in popular crates (serde, clap, tokio)
Common Pitfalls and How to Avoid Them
1. Overusing Macros
Problem: Making everything a macro Solution: Start with functions, use macros only when necessary
2. Poor Error Messages
Problem: Cryptic macro errors Solution: Add helpful error messages in your macros
macro_rules! ensure_positive {
    ($val:expr) => {
        if $val <= 0 {
            compile_error!("Value must be positive!");
        }
    };
}
3. Macro Recursion Limits
Problem: Deep recursion in macro expansion Solution: Limit recursion depth and use iterative approaches when possible
Conclusion: Embracing the Macro Mindset
Macros are one of Rust's superpowers, but they're not magic – they're tools that solve specific problems. The key is understanding when to use them and when not to.
Here's what I've learned from using macros in real projects:
1. Start simple - Master declarative macros before moving to procedural ones 2. Solve real problems - Don't use macros just because they're cool 3. Think about users - Good macros feel natural and have clear error messages 4. Performance matters - Consider both compile-time and runtime implications
The journey from macro-phobic to macro-enthusiast isn't overnight, but once you start seeing the patterns and possibilities, you'll find yourself reaching for macros to solve problems you didn't even know they could solve.
Whether you're building a simple debug helper or a complex derive macro that generates thousands of lines of code, remember that macros are about making your code more expressive and reducing repetition. They're not just a feature – they're a way of thinking about code generation and abstraction.

Ready to start your macro journey? Pick one of the examples in this post, try it out, and then experiment with your own variations. Remember, every expert was once a beginner, and every complex macro started as a simple pattern.
---
Want to see more Rust content? Check out my other posts on Rust development setup and follow my coding journey at iamdhakrey.dev. Happy macro writing! 🦀
Quick Reference: Macro Cheat Sheet
Declarative Macro Syntax
macro_rules! name {
    (pattern) => { expansion };
}
Fragment Specifiers
- expr - Expression
ident - Identifierty - Typestmt - Statementblock - Blockitem - Itempat - Patternpath - PathRepetition Patterns
- $(...)* - Zero or more
$(...)+ - One or more$(...)? - Zero or oneUseful Macros for Macro Writing
- stringify! - Convert to string literal
concat! - Concatenate string literalscompile_error! - Emit compile-time errorRelated Articles
My Rust Development Setup on Garuda Linux with VS Code: A Developer's Journey
How I configured the perfect Rust development environment on Garuda Linux using VS Code. From rust-analyzer to debugging, here's my complete setup for building blazingly fast applications.
Contributing to Kibi: Adding a Comment Toggle Feature
My journey contributing a Ctrl+/ comment toggle feature to Kibi, a minimal Rust text editor with a strict 1024-line code limit. Learn about working within constraints, code review, and making your first open source contribution.