Advanced Networking: VLANs, Bridges, and Network Namespaces - Mastering Complex Network Topologies
Advanced Networking: VLANs, Bridges, and Network Namespaces
So you think you know Linux networking? Let me tell you about the day I realized I knew nothing.
I was tasked with setting up network isolation for a multi-tenant application. "How hard can it be?" I thought. "Just give each tenant their own server." Then I saw the budget. Then I realized we needed dozens of isolated networks that could still communicate with each other in specific ways. That's when I discovered Linux has networking superpowers I never knew existed.
Today, I want to share what I learned about VLANs, bridges, and network namespaces—the tools that power everything from Docker containers to massive cloud platforms. Fair warning: this gets pretty deep, but stick with me. By the end, you'll understand how your laptop can run dozens of completely isolated network environments simultaneously.
The Problem That Started My Journey
Picture this: You're running a SaaS platform where customers upload sensitive data. Each customer needs their data completely isolated from others, but they all need internet access and some shared services. Traditional networking says "buy separate hardware for each customer." Modern Linux networking says "hold my beer."
This is where network namespaces, VLANs, and bridges come in. They let you create virtual network infrastructure that's just as isolated and flexible as physical hardware, but running entirely in software.
Network Namespaces: Your Own Private Network Universe
The first concept that blew my mind was network namespaces. Imagine if you could create completely separate network stacks on the same machine—each with their own interfaces, routing tables, and firewall rules. That's exactly what network namespaces do.
My First "Whoa" Moment
Here's the experiment that made it click for me:
# First, see what network interfaces I have normally
ip addr show

# Create a new network namespace
sudo ip netns add my_private_world

# Enter this new world
sudo ip netns exec my_private_world bash

# Look around - where did everything go?!
ip addr show  # Only loopback interface!
ip route show  # No routes!
I was in the same Linux machine, but from a networking perspective, I was in a completely different universe. No network interfaces, no routes, no connectivity. It was like being in a clean room.
# Create veth pairs for inter-namespace communication
sudo ip link add veth-front type veth peer name veth-front-br
sudo ip link add veth-back type veth peer name veth-back-br
sudo ip link add veth-db type veth peer name veth-db-br

# Move one end of each pair to respective namespaces
sudo ip link set veth-front netns frontend
sudo ip link set veth-back netns backend
sudo ip link set veth-db netns database

# Configure IP addresses in namespaces
sudo ip netns exec frontend ip addr add 10.0.1.10/24 dev veth-front
sudo ip netns exec backend ip addr add 10.0.2.10/24 dev veth-back
sudo ip netns exec database ip addr add 10.0.3.10/24 dev veth-db

# Bring up interfaces
sudo ip netns exec frontend ip link set veth-front up
sudo ip netns exec backend ip link set veth-back up
sudo ip netns exec database ip link set veth-db up
Linux Bridges: Software-Defined Switching
Bridges in Linux act as virtual switches, connecting multiple network segments and enabling communication between different networks.
Understanding Bridge Functionality
A Linux bridge operates at Layer 2 (Data Link layer) and:
Creating and Managing Bridges
# Install bridge utilities (if not already installed)
sudo apt install bridge-utils   # Ubuntu/Debian
sudo dnf install bridge-utils   # RHEL/CentOS/Fedora

# Create a bridge
sudo ip link add name br0 type bridge

# Alternative using brctl (legacy tool)
sudo brctl addbr br0

# Configure bridge IP address
sudo ip addr add 192.168.100.1/24 dev br0

# Bring the bridge up
### Building My First Virtual Network

Once I understood that I was in a private network universe, I wanted to connect it to something. This is where virtual ethernet pairs (veth pairs) come in. Think of them as a network cable that you can stretch between universes.
Create two network namespaces (like two separate rooms)
sudo ip netns add room1 sudo ip netns add room2
Create a virtual cable connecting them
sudo ip link add veth1 type veth peer name veth2
Put one end of the cable in room1
sudo ip link set veth1 netns room1
Put the other end in room2
sudo ip link set veth2 netns room2
Give each end an IP address
sudo ip netns exec room1 ip addr add 10.0.1.1/24 dev veth1 sudo ip netns exec room2 ip addr add 10.0.1.2/24 dev veth2
Turn on the interfaces
sudo ip netns exec room1 ip link set veth1 up sudo ip netns exec room2 ip link set veth2 up
Test the connection
sudo ip netns exec room1 ping 10.0.1.2 # Success!
That moment when the ping worked was magical. I had just created two completely isolated network environments and connected them with a virtual cable. No physical hardware involved.

### The Real-World Application That Changed Everything

Here's where it got interesting. I needed to set up a development environment that mimicked our production setup:

- A frontend service that customers hit
- A backend API that processes requests
- A database that only the backend can access
- All three needed internet access for updates

Traditional approach: Three virtual machines. My approach: Three network namespaces.
Create the three services
sudo ip netns add frontend sudo ip netns add backend sudo ip netns add database
Create a software switch (bridge) to connect them
sudo ip link add name dev-bridge type bridge sudo ip link set dev-bridge up
Create virtual cables from each service to the switch
sudo ip link add veth-fe type veth peer name veth-fe-br sudo ip link add veth-be type veth peer name veth-be-br sudo ip link add veth-db type veth peer name veth-db-br
Connect one end to the services
sudo ip link set veth-fe netns frontend sudo ip link set veth-be netns backend sudo ip link set veth-db netns database
Connect the other end to the switch
sudo ip link set veth-fe-br master dev-bridge sudo ip link set veth-be-br master dev-bridge sudo ip link set veth-db-br master dev-bridge
Turn everything on
sudo ip link set veth-fe-br up sudo ip link set veth-be-br up sudo ip link set veth-db-br up
Give each service an IP address
sudo ip netns exec frontend ip addr add 10.0.0.10/24 dev veth-fe sudo ip netns exec backend ip addr add 10.0.0.20/24 dev veth-be sudo ip netns exec database ip addr add 10.0.0.30/24 dev veth-db
Turn on the interfaces in each service
sudo ip netns exec frontend ip link set veth-fe up sudo ip netns exec backend ip link set veth-be up sudo ip netns exec database ip link set veth-db up
The result? Three completely isolated services that could talk to each other as if they were on separate machines, but running on my laptop.
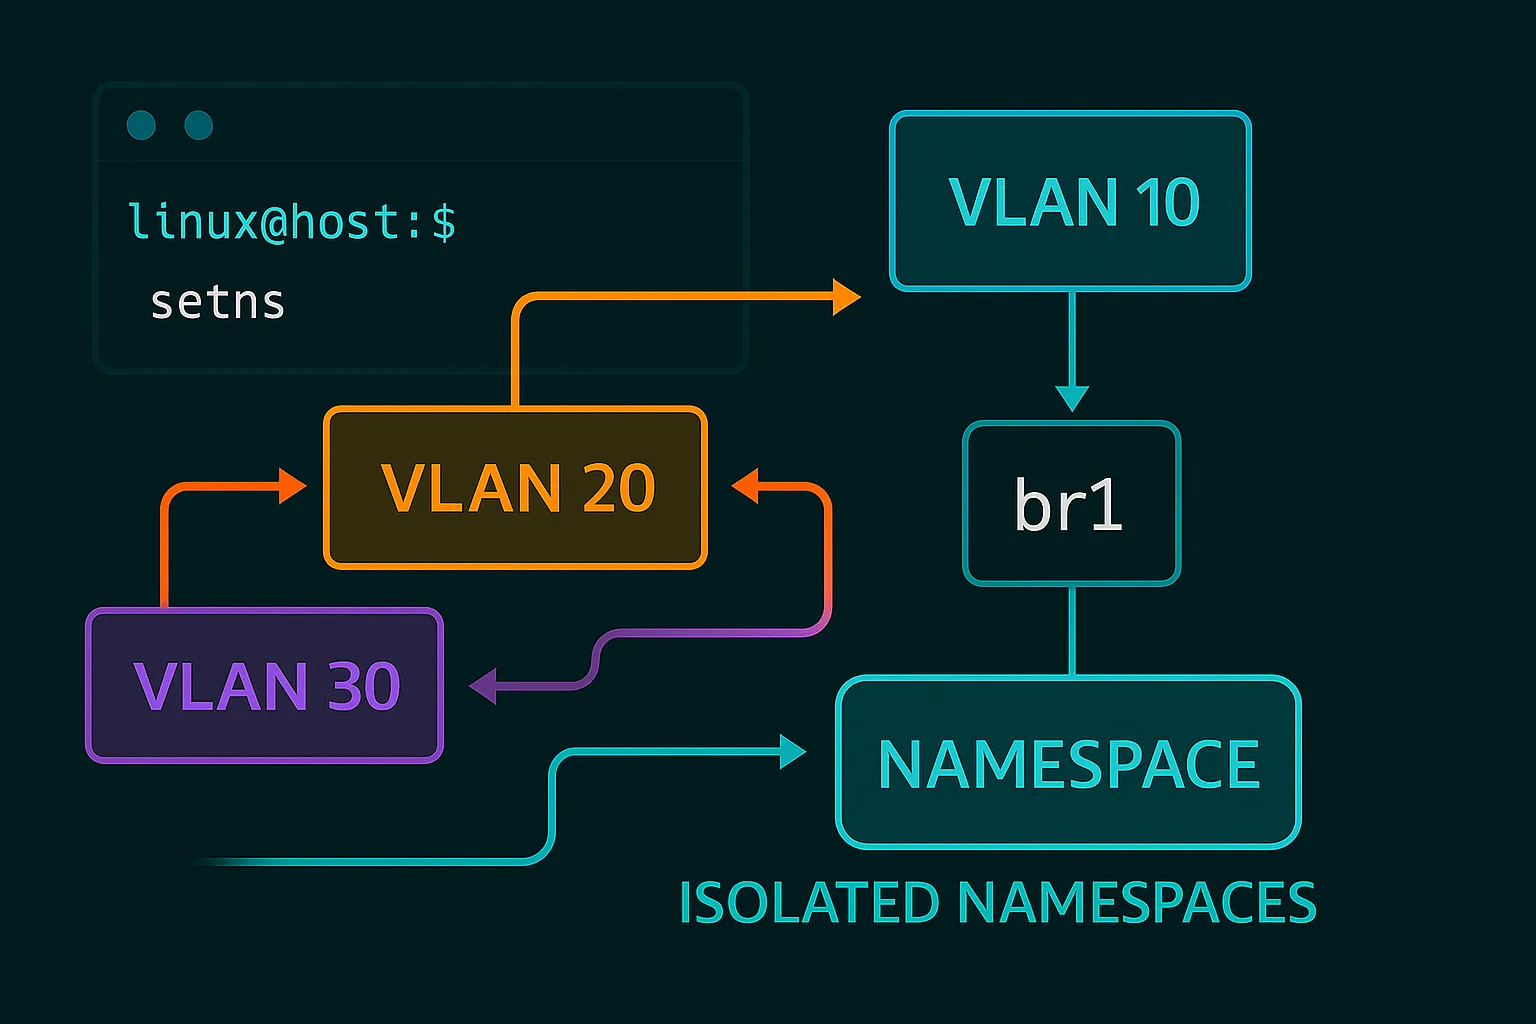
## VLANs: When You Need Even More Organization
Network namespaces are great for complete isolation, but sometimes you want multiple networks that share some infrastructure. That's where VLANs (Virtual LANs) come in.
Think of VLANs like having multiple invisible network cables running through the same physical cable. Each VLAN is tagged with a number, and only devices that understand that tag can see the traffic.
### My VLAN Learning Experience
I first encountered VLANs when I needed to segregate traffic types:
- VLAN 10: User traffic
- VLAN 20: Admin traffic
- VLAN 30: Backup traffic
All three needed to use the same network switch, but they couldn't interfere with each other.Load 8021q module for VLAN support
sudo modprobe 8021q
Make it persistent
echo "8021q" | sudo tee -a /etc/modules
Create VLAN interfaces
sudo ip link add link eth0 name eth0.100 type vlan id 100 sudo ip link add link eth0 name eth0.200 type vlan id 200 sudo ip link add link eth0 name eth0.300 type vlan id 300
Configure IP addresses for VLANs
sudo ip addr add 10.100.1.1/24 dev eth0.100 sudo ip addr add 10.200.1.1/24 dev eth0.200 sudo ip addr add 10.300.1.1/24 dev eth0.300
Bring up VLAN interfaces
sudo ip link set eth0.100 up sudo ip link set eth0.200 up sudo ip link set eth0.300 up
Verify VLAN configuration
ip link show type vlan
### Advanced VLAN Scenario: Enterprise Network Segmentation

Let's create a realistic enterprise scenario with different departments:
!/bin/bash
Enterprise VLAN setup
Define VLANs for different departments
declare -A vlans=( [10]="management" [20]="development" [30]="production" [40]="guest" [99]="dmz" )
Define IP ranges for each VLAN
declare -A vlan_networks=( [10]="10.10.0" [20]="10.20.0" [30]="10.30.0" [40]="10.40.0" [99]="10.99.0" )
Create VLAN interfaces
for vlan_id in "${!vlans[@]}"; do dept=${vlans[$vlan_id]} network=${vlan_networks[$vlan_id]} echo "Creating VLAN $vlan_id for $dept department..." # Create VLAN interface sudo ip link add link eth0 name eth0.$vlan_id type vlan id $vlan_id # Assign IP address sudo ip addr add ${network}.1/24 dev eth0.$vlan_id # Bring up interface sudo ip link set eth0.$vlan_id up echo "VLAN $vlan_id ($dept): ${network}.1/24" done
Create namespace for each department
for vlan_id in "${!vlans[@]}"; do dept=${vlans[$vlan_id]} network=${vlan_networks[$vlan_id]} # Create namespace sudo ip netns add ns-$dept sudo ip netns exec ns-$dept ip link set lo up # Create veth pair sudo ip link add veth-$dept type veth peer name veth-$dept-host # Move one end to namespace sudo ip link set veth-$dept netns ns-$dept # Configure namespace interface sudo ip netns exec ns-$dept ip addr add ${network}.10/24 dev veth-$dept sudo ip netns exec ns-$dept ip link set veth-$dept up sudo ip netns exec ns-$dept ip route add default via ${network}.1 # Create bridge for this VLAN sudo ip link add name br-$dept type bridge sudo ip link set br-$dept up # Add VLAN interface and veth to bridge sudo ip link set eth0.$vlan_id master br-$dept sudo ip link set veth-$dept-host master br-$dept sudo ip link set veth-$dept-host up done
echo "Enterprise VLAN setup complete!"
## Complex Network Topology Example: Container Networking

Let's create a sophisticated network topology similar to what Docker or Kubernetes might use:
!/bin/bash
Container-like networking setup
Create container namespaces
containers=("web1" "web2" "api1" "api2" "db1" "db2")
for container in "${containers[@]}"; do sudo ip netns add $container sudo ip netns exec $container ip link set lo up done
Create network bridges for different tiers
bridges=("frontend" "backend" "database") for bridge in "${bridges[@]}"; do sudo ip link add name br-$bridge type bridge sudo ip link set br-$bridge up done
Configure bridge IP addresses
sudo ip addr add 172.20.1.1/24 dev br-frontend # Frontend network sudo ip addr add 172.20.2.1/24 dev br-backend # Backend network sudo ip addr add 172.20.3.1/24 dev br-database # Database network
Connect web containers to frontend bridge
for i in 1 2; do sudo ip link add veth-web${i} type veth peer name veth-web${i}-br sudo ip link set veth-web${i} netns web${i} sudo ip netns exec web${i} ip addr add 172.20.1.1${i}/24 dev veth-web${i} sudo ip netns exec web${i} ip link set veth-web${i} up sudo ip netns exec web${i} ip route add default via 172.20.1.1 sudo ip link set veth-web${i}-br master br-frontend sudo ip link set veth-web${i}-br up done
Connect API containers to backend bridge
for i in 1 2; do sudo ip link add veth-api${i} type veth peer name veth-api${i}-br sudo ip link set veth-api${i} netns api${i} sudo ip netns exec api${i} ip addr add 172.20.2.1${i}/24 dev veth-api${i} sudo ip netns exec api${i} ip link set veth-api${i} up sudo ip netns exec api${i} ip route add default via 172.20.2.1 sudo ip link set veth-api${i}-br master br-backend sudo ip link set veth-api${i}-br up done
Connect database containers to database bridge
for i in 1 2; do sudo ip link add veth-db${i} type veth peer name veth-db${i}-br sudo ip link set veth-db${i} netns db${i} sudo ip netns exec db${i} ip addr add 172.20.3.1${i}/24 dev veth-db${i} sudo ip netns exec db${i} ip link set veth-db${i} up sudo ip netns exec db${i} ip route add default via 172.20.3.1 sudo ip link set veth-db${i}-br master br-database sudo ip link set veth-db${i}-br up done
Create inter-bridge connectivity (routed networks)
sudo ip link add veth-front-back type veth peer name veth-back-front sudo ip link add veth-back-db type veth peer name veth-db-back
Connect frontend to backend
sudo ip link set veth-front-back master br-frontend sudo ip link set veth-back-front master br-backend sudo ip link set veth-front-back up sudo ip link set veth-back-front up
Connect backend to database
sudo ip link set veth-back-db master br-backend sudo ip link set veth-db-back master br-database sudo ip link set veth-back-db up sudo ip link set veth-db-back up
Enable IP forwarding for routing between networks
echo 1 | sudo tee /proc/sys/net/ipv4/ip_forward
Add routing rules
sudo ip route add 172.20.2.0/24 via 172.20.1.1 dev br-frontend sudo ip route add 172.20.3.0/24 via 172.20.2.1 dev br-backend
echo "Container networking topology created!" echo "Test connectivity:" echo "sudo ip netns exec web1 ping 172.20.2.11 # web to API" echo "sudo ip netns exec api1 ping 172.20.3.11 # API to DB"
## Advanced Routing and Traffic Control

### Policy-Based Routing
Create custom routing tables
echo "100 frontend" | sudo tee -a /etc/iproute2/rt_tables echo "200 backend" | sudo tee -a /etc/iproute2/rt_tables echo "300 database" | sudo tee -a /etc/iproute2/rt_tables
Add rules for policy-based routing
sudo ip rule add from 172.20.1.0/24 table frontend sudo ip rule add from 172.20.2.0/24 table backend sudo ip rule add from 172.20.3.0/24 table database
Configure routing tables
sudo ip route add default via 172.20.1.1 dev br-frontend table frontend sudo ip route add default via 172.20.2.1 dev br-backend table backend sudo ip route add default via 172.20.3.1 dev br-database table database
### Traffic Control and Quality of ServiceInstall traffic control tools
sudo apt install iproute2-tc # Ubuntu/Debian
Create traffic control rules for bandwidth management
Limit frontend bridge to 100Mbps
sudo tc qdisc add dev br-frontend root handle 1: htb default 30 sudo tc class add dev br-frontend parent 1: classid 1:1 htb rate 100mbit sudo tc class add dev br-frontend parent 1:1 classid 1:10 htb rate 80mbit ceil 100mbit sudo tc class add dev br-frontend parent 1:1 classid 1:20 htb rate 20mbit ceil 40mbit
Add filters to classify traffic
sudo tc filter add dev br-frontend protocol ip parent 1:0 prio 1 u32 match ip src 172.20.1.0/24 flowid 1:10 sudo tc filter add dev br-frontend protocol ip parent 1:0 prio 2 u32 match ip sport 80 0xffff flowid 1:20
Create traffic shaping for uploads
sudo tc qdisc add dev br-backend root netem delay 10ms
## Security Considerations and Firewall Rules

### Namespace-Specific Firewall Rules
Apply different firewall rules per namespace
Frontend namespace - allow HTTP/HTTPS only
sudo ip netns exec web1 iptables -P INPUT DROP sudo ip netns exec web1 iptables -P FORWARD DROP sudo ip netns exec web1 iptables -P OUTPUT ACCEPT sudo ip netns exec web1 iptables -A INPUT -p tcp --dport 80 -j ACCEPT sudo ip netns exec web1 iptables -A INPUT -p tcp --dport 443 -j ACCEPT sudo ip netns exec web1 iptables -A INPUT -i lo -j ACCEPT
Backend namespace - allow API ports only
sudo ip netns exec api1 iptables -P INPUT DROP sudo ip netns exec api1 iptables -P FORWARD DROP sudo ip netns exec api1 iptables -P OUTPUT ACCEPT sudo ip netns exec api1 iptables -A INPUT -p tcp --dport 8080 -j ACCEPT sudo ip netns exec api1 iptables -A INPUT -s 172.20.1.0/24 -j ACCEPT sudo ip netns exec api1 iptables -A INPUT -i lo -j ACCEPT
Database namespace - restrictive access
sudo ip netns exec db1 iptables -P INPUT DROP sudo ip netns exec db1 iptables -P FORWARD DROP sudo ip netns exec db1 iptables -P OUTPUT ACCEPT sudo ip netns exec db1 iptables -A INPUT -p tcp --dport 3306 -s 172.20.2.0/24 -j ACCEPT sudo ip netns exec db1 iptables -A INPUT -i lo -j ACCEPT
### Bridge-Level SecurityEnable bridge netfilter for iptables integration
echo 1 | sudo tee /proc/sys/net/bridge/bridge-nf-call-iptables echo 1 | sudo tee /proc/sys/net/bridge/bridge-nf-call-ip6tables
Create bridge-specific filtering
sudo iptables -A FORWARD -i br-frontend -o br-backend -p tcp --dport 8080 -j ACCEPT sudo iptables -A FORWARD -i br-backend -o br-database -p tcp --dport 3306 -j ACCEPT sudo iptables -A FORWARD -j DROP
## Monitoring and Troubleshooting Advanced Networks

### Network Monitoring Tools
Monitor bridge MAC address tables
sudo brctl showmacs br-frontend
Monitor namespace network statistics
sudo ip netns exec web1 ss -tulpn sudo ip netns exec web1 netstat -rn
Monitor traffic between namespaces
sudo ip netns exec web1 tcpdump -i veth-web1 -n
Monitor bridge traffic
sudo tcpdump -i br-frontend -n
Check VLAN tagging
sudo tcpdump -i eth0 -nn -e vlan
### Advanced Debugging TechniquesCreate debugging script
cat > debug_network.sh << 'EOF'
!/bin/bash
echo "=== Network Namespace Information ===" ip netns list
echo -e "\n=== Bridge Information ===" ip link show type bridge
echo -e "\n=== VLAN Interfaces ===" ip link show type vlan
echo -e "\n=== Routing Tables ===" ip route show ip rule show
echo -e "\n=== Bridge Details ===" for bridge in $(ip link show type bridge | grep -o 'br-[^:]*'); do echo "Bridge: $bridge" ip link show master $bridge echo "" done
echo -e "\n=== Namespace Connectivity Test ===" for ns in $(ip netns list); do echo "Namespace: $ns" sudo ip netns exec $ns ip addr show | grep -E 'inet|inet6' echo "" done EOF
chmod +x debug_network.sh ./debug_network.sh
## Real-World Application: Cloud Provider Network Simulation

Let's create a complete simulation of a cloud provider's networking infrastructure:
!/bin/bash
Cloud provider network simulation
Create availability zones
zones=("zone-a" "zone-b" "zone-c") for zone in "${zones[@]}"; do sudo ip netns add $zone sudo ip netns exec $zone ip link set lo up done
Create inter-zone backbone
sudo ip link add name backbone type bridge sudo ip addr add 10.0.0.1/16 dev backbone sudo ip link set backbone up
Create zone-specific infrastructure
for i in "${!zones[@]}"; do zone=${zones[$i]} zone_id=$((i + 1)) echo "Setting up $zone (ID: $zone_id)..." # Create zone bridge sudo ip link add name br-$zone type bridge sudo ip addr add 10.$zone_id.0.1/24 dev br-$zone sudo ip link set br-$zone up # Connect zone to backbone sudo ip link add veth-$zone-backbone type veth peer name veth-backbone-$zone sudo ip link set veth-$zone-backbone master br-$zone sudo ip link set veth-backbone-$zone master backbone sudo ip link set veth-$zone-backbone up sudo ip link set veth-backbone-$zone up # Create tenant VMs in this zone for vm in 1 2 3; do vm_name="vm-$zone-$vm" sudo ip netns add $vm_name sudo ip netns exec $vm_name ip link set lo up # Connect VM to zone bridge sudo ip link add veth-$vm_name type veth peer name veth-$vm_name-br sudo ip link set veth-$vm_name netns $vm_name sudo ip netns exec $vm_name ip addr add 10.$zone_id.$vm.10/24 dev veth-$vm_name sudo ip netns exec $vm_name ip link set veth-$vm_name up sudo ip netns exec $vm_name ip route add default via 10.$zone_id.0.1 sudo ip link set veth-$vm_name-br master br-$zone sudo ip link set veth-$vm_name-br up echo " Created $vm_name: 10.$zone_id.$vm.10/24" done done
Create load balancer namespace
sudo ip netns add loadbalancer sudo ip netns exec loadbalancer ip link set lo up
Connect load balancer to backbone
sudo ip link add veth-lb type veth peer name veth-lb-backbone sudo ip link set veth-lb netns loadbalancer sudo ip netns exec loadbalancer ip addr add 10.254.254.10/16 dev veth-lb sudo ip netns exec loadbalancer ip link set veth-lb up sudo ip netns exec loadbalancer ip route add default via 10.0.0.1
sudo ip link set veth-lb-backbone master backbone sudo ip link set veth-lb-backbone up
echo "Cloud infrastructure simulation complete!" echo "Test inter-zone connectivity:" echo "sudo ip netns exec vm-zone-a-1 ping 10.2.1.10 # zone-a to zone-b" echo "sudo ip netns exec loadbalancer ping 10.1.1.10 # LB to zone-a VM"
## Performance Optimization and Best Practices

### Network Performance Tuning
Optimize bridge performance
echo 0 | sudo tee /sys/class/net/br-frontend/bridge/stp_state # Disable STP echo 1 | sudo tee /sys/class/net/br-frontend/bridge/ageing_time
Optimize namespace performance
for ns in $(ip netns list); do sudo ip netns exec $ns sysctl -w net.core.rmem_max=134217728 sudo ip netns exec $ns sysctl -w net.core.wmem_max=134217728 sudo ip netns exec $ns sysctl -w net.ipv4.tcp_rmem="4096 87380 134217728" sudo ip netns exec $ns sysctl -w net.ipv4.tcp_wmem="4096 65536 134217728" done
Optimize VLAN performance
ethtool -K eth0 rx-vlan-offload on ethtool -K eth0 tx-vlan-offload on
### Automation and Infrastructure as CodeCreate reusable network functions
create_isolated_environment() { local env_name=$1 local ip_base=$2 # Create namespace sudo ip netns add $env_name sudo ip netns exec $env_name ip link set lo up # Create bridge sudo ip link add name br-$env_name type bridge sudo ip addr add ${ip_base}.1/24 dev br-$env_name sudo ip link set br-$env_name up # Create connection sudo ip link add veth-$env_name type veth peer name veth-$env_name-br sudo ip link set veth-$env_name netns $env_name sudo ip netns exec $env_name ip addr add ${ip_base}.10/24 dev veth-$env_name sudo ip netns exec $env_name ip link set veth-$env_name up sudo ip netns exec $env_name ip route add default via ${ip_base}.1 sudo ip link set veth-$env_name-br master br-$env_name sudo ip link set veth-$env_name-br up echo "Created isolated environment: $env_name ($ip_base.0/24)" }
Usage examples
create_isolated_environment "dev" "10.100.1" create_isolated_environment "staging" "10.100.2" create_isolated_environment "prod" "10.100.3"
## Integration with Container Orchestration

### Understanding How Kubernetes Uses These Concepts
Simulate Kubernetes CNI behavior
!/bin/bash
Kubernetes-like pod networking
Create cluster bridge (like docker0)
sudo ip link add name cni0 type bridge sudo ip addr add 10.244.0.1/16 dev cni0 sudo ip link set cni0 up
Function to create a "pod"
create_pod() { local pod_name=$1 local pod_ip=$2 # Create pod namespace sudo ip netns add $pod_name sudo ip netns exec $pod_name ip link set lo up # Create veth pair sudo ip link add veth-$pod_name type veth peer name veth-$pod_name-host # Move one end to pod namespace sudo ip link set veth-$pod_name netns $pod_name # Configure pod interface sudo ip netns exec $pod_name ip addr add $pod_ip/16 dev veth-$pod_name sudo ip netns exec $pod_name ip link set veth-$pod_name up sudo ip netns exec $pod_name ip route add default via 10.244.0.1 # Connect to cluster bridge sudo ip link set veth-$pod_name-host master cni0 sudo ip link set veth-$pod_name-host up echo "Created pod: $pod_name ($pod_ip)" }
Create pods
create_pod "nginx-pod" "10.244.1.10" create_pod "api-pod" "10.244.1.11" create_pod "db-pod" "10.244.1.12"
Test pod-to-pod connectivity
echo "Testing pod connectivity..." sudo ip netns exec nginx-pod ping -c 1 10.244.1.11 sudo ip netns exec api-pod ping -c 1 10.244.1.12
## Cleanup and Management Scripts!/bin/bash
Comprehensive cleanup script
echo "Cleaning up advanced networking setup..."
Remove all namespaces
for ns in $(ip netns list | awk '{print $1}'); do echo "Removing namespace: $ns" sudo ip netns delete $ns done
Remove all bridges
for bridge in $(ip link show type bridge | grep -o 'br-[^:]*\|backbone\|cni0'); do echo "Removing bridge: $bridge" sudo ip link delete $bridge done
Remove VLAN interfaces
for vlan in $(ip link show type vlan | grep -o 'eth0\.[0-9]*'); do echo "Removing VLAN: $vlan" sudo ip link delete $vlan done
Reset IP forwarding
echo 0 | sudo tee /proc/sys/net/ipv4/ip_forward
Clear custom routing rules
sudo ip rule flush sudo ip rule add from all lookup main sudo ip rule add from all lookup default
echo "Cleanup complete!"
## Key Takeaways and Best Practices
### Technical Mastery Points
- Namespace Isolation: Complete network separation for security and multi-tenancy
### Production Considerations
1. Security: Implement proper firewall rules and access controls
### Real-World Applications
These advanced networking concepts are the foundation of:
## Practical Exercises
### Exercise 1: Multi-Tier Application Network
Create a three-tier application network with proper security segmentation:
### Exercise 2: Cloud Provider Simulation
Build a multi-tenant cloud environment with:
### Exercise 3: Container Runtime Network
Implement container networking similar to Docker or Kubernetes:
Advanced Linux networking transforms how we think about infrastructure. These technologies enable the software-defined networks that power modern cloud computing, container orchestration, and edge computing platforms.
By mastering network namespaces, VLANs, and bridges, you're not just learning Linux networking—you're understanding the fundamental building blocks of modern distributed systems. Whether you're designing microservices architectures, implementing container platforms, or building cloud infrastructure, these skills are essential for creating scalable, secure, and efficient network topologies.
---
## 🚀 Continue Your Linux Journey
This is Part 22 of our comprehensive Linux mastery series - Advanced Network Architecture!
Previous: Container Fundamentals - Master Docker and containerization
🎓 Series Complete! You've now mastered the complete Linux ecosystem from beginner to expert level!
### 📚 Complete Linux Series Navigation
🎯 Complete Learning Path Mastered:
### 🔗 Related Advanced Topics
### 🚀 What's Next?
🏅 Congratulations! You've completed one of the most comprehensive Linux learning journeys available. You now have the skills to architect, deploy, and manage complex Linux-based infrastructure at enterprise scale.
---
Ready to apply your Linux mastery to cloud platforms and container orchestration? Your journey into advanced infrastructure and DevOps engineering starts now!
Related Articles
Network Configuration and Troubleshooting in Linux
Master Linux networking with ip, netstat, ss commands. Learn to configure static IPs, troubleshoot connectivity issues, and diagnose network problems like a pro.
Linux Firewalls: iptables vs ufw vs firewalld - Complete Security Guide
Master Linux firewall configuration with comprehensive comparisons of iptables, ufw, and firewalld. Learn practical security setups, real-world examples, and best practices for securing your servers.